CIA Hive Beacon Infrastructure复现2——使用Apache mod_rewrite实现https流量分发
上篇文章介绍了使用Apache的mod_rewrite模块来实现http流量分发,本文将在此基础上介绍https的流量分发,对客户端的证书进行判断,若证书有效,才会将流量转发至真实服务器。
本文将要介绍以下内容:
Windows系统下配置Apache开启ssl
Ubuntu系统下配置Apache开启ssl
使用openssl生成证书的方法和难点
Apache Https双向认证的配置
实现https流量分发的过程
地址:
http://httpd.apache.org/download.cgi
选择需要的版本,测试版本Apache 2.4.33,下载地址:
https://www.apachehaus.com/cgi-bin/download.plx?dli=wUWZ1allWW00kej9iUG5UeJVlUGRVYRdnWzQmW
解压后通过命令行安装:
cd \Apace24\bin
httpd -k install
位于\Apace24\conf\httpd.conf
定位:
#LoadModule ssl_module modules/mod_ssl.so
去掉#
定位:
<IfModule ssl_module>
Include conf/extra/httpd-ahssl.conf
SSLRandomSeed startup builtin
SSLRandomSeed connect builtin
</IfModule>
将Include conf/extra/httpd-ahssl.conf改为Include conf/extra/httpd-ssl.conf
注:
httpd-ahssl.conf是Apache自带的ssl配置,默认生成了可用的私钥和证书(位于\Apace24\conf\ssl),也可以直接修改httpd-ahssl.conf进行配置
位于\Apache24\conf\extra\httpd-ssl.conf
定位:
<VirtualHost _default_:443>

#   General setup for the virtual host
DocumentRoot "${SRVROOT}/htdocs"
ServerName www.example.com:443
修改为:
<VirtualHost _default_:443>

#   General setup for the virtual host
DocumentRoot "${SRVROOT}/htdocs"
ServerName test.com:443
定位:
SSLCertificateFile "${SRVROOT}/conf/server.crt"
修改为自己证书文件的路径(后面会介绍生成方法)
定位:
SSLCertificateKeyFile "${SRVROOT}/conf/server.key"
修改为自己私钥文件的路径(后面会介绍生成方法)
httpd.exe -k restart
sudo apt-get install apache2
sudo apt-get install openssl
a2enmod ssl
/etc/apache2/sites-enabled/default-ssl.conf指定私钥文件和签名证书的路径
SSLEngine on
SSLCertificateFile /etc/apache2/ssl/test.com.crt
SSLCertificateKeyFile /etc/apache2/ssl/test.com.key
a2ensite default-ssl
sudo /etc/init.d/apache2 restart
将csr文件发送给CA机构进行校验,若审核通过,CA机构使用自己的私钥对csr文件进行签名,生成证书文件(.crt文件),发给用户,用户使用该证书证明自己的身份
生成方法:
输入:
用户私钥
用户信息
输出:
csr文件,包括用户公钥和用户信息
一般是将csr文件发送到证书签发机构CA进行校验,但是我们可以自己对其审核,生成一个自签名证书(可用于测试,无法保证可信)
Ubuntu安装openssl后可直接运行openssl
Windows安装Apache后默认安装openssl,位于\Apache24\bin
openssl genrsa -out server.key 2048
openssl req -new -key server.key -out server.csr
接着依次填入配置信息,Common Name项要同域名对应(测试域名为test.com)
openssl x509 -req -days 3650 -in server.csr -signkey server.key -out server.crt
通过网站自动生成openssl配置参数,地址如下:
https://myssl.com/csr_create.html
填入配置信息后自动生成openssl参数,如下图
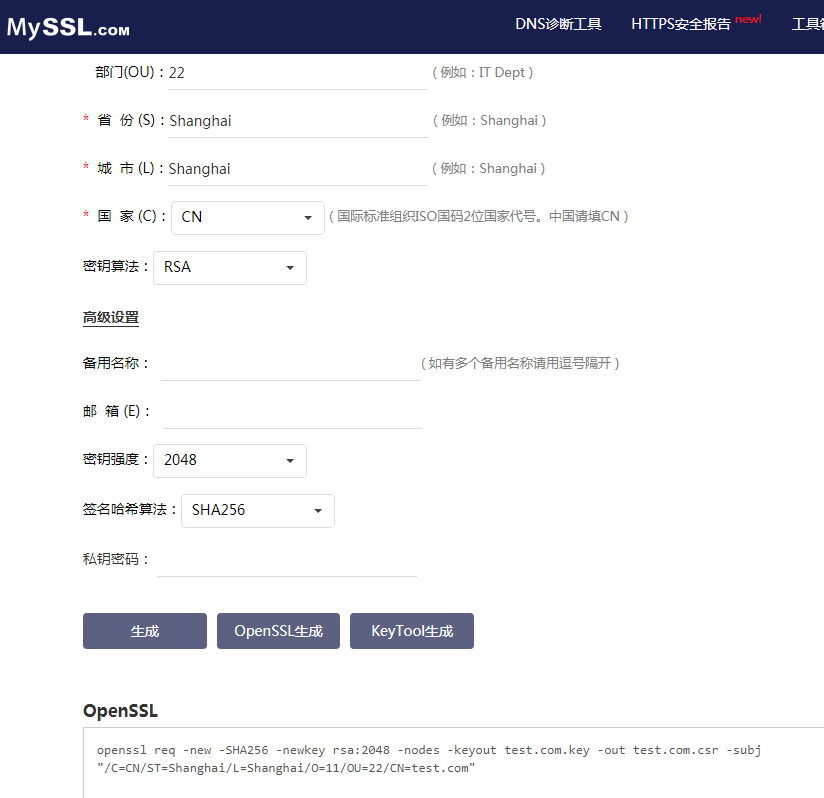
参数如下:
openssl req -new -SHA256 -newkey rsa:2048 -nodes -keyout test.com.key -out test.com.csr -subj "/C=CN/ST=Shanghai/L=Shanghai/O=11/OU=22/CN=test.com"
生成私钥文件test.com.key和证书签名请求test.com.csr
接着生成自签名证书:
openssl x509 -req -days 3650 -in test.com.csr -signkey test.com.key -out test.com.crt
实际测试:
SSLCertificateFile指向自签名证书(.crt文件)路径
SSLCertificateKeyFile指向私钥文件(.key文件)路径
重启apache服务
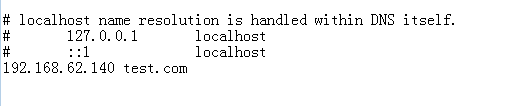
apache服务器ip对应test.com
如下图
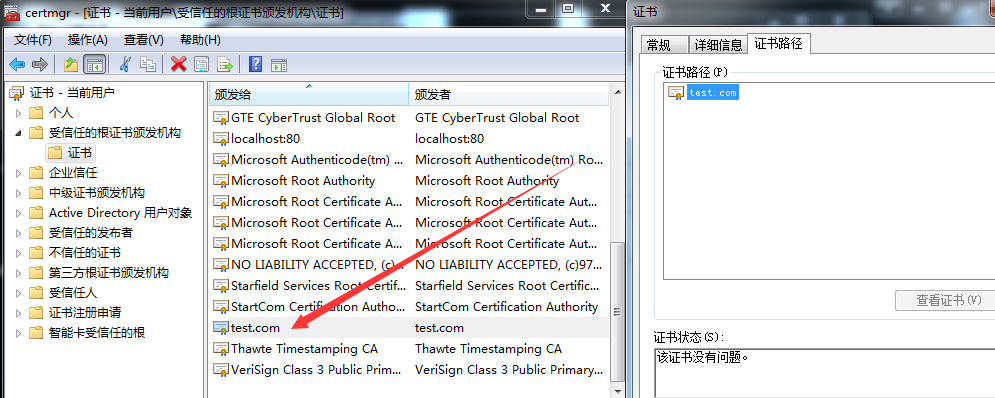
受信任的根证书颁发机构安装后如下图
访问失败,提示它的安全证书没有指定主题备用名称,如下图

常规方法和快捷方法生成的证书均存在这个问题
证书缺少主题备用名称SAN (Subject Alternate Name),需要通过配置文件进行添加
参考资料:
https://support.citrix.com/article/CTX135602_
新建文件req.cnf,内容如下:
[req]
distinguished_name = req_distinguished_name
x509_extensions = v3_req
prompt = no
[req_distinguished_name]
C = US
ST = VA
L = SomeCity
O = MyCompany
OU = MyDivision
CN = test.com
[v3_req]
keyUsage = critical, digitalSignature, keyAgreement
extendedKeyUsage = serverAuth
subjectAltName = @alt_names
[alt_names]
DNS.1 = test.com
注:
CN和DNS.1都需要设定为域名(测试域名为test.com)
生成私钥和自签名证书:
openssl req -x509 -nodes -days 365 -newkey rsa:2048 -keyout test.com.key -out test.com.crt -config req.cnf -sha256
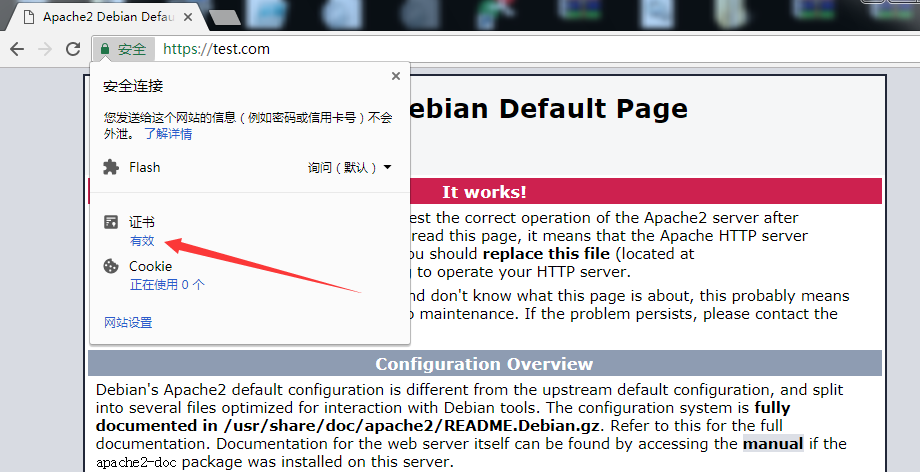
修改apache服务器的ssl配置,指定新的私钥文件(test.com.key)和证书文件(test.com.crt),重启apache服务
客户端安装自签名证书文件test.com.crt
访问Apache服务器,证书有效,一切正常,如下图
补充:
在未来,openssl有可能支持设置参数DNS.1,相关资料:
https://github.com/openssl/openssl/pull/4986
服务器验证客户端证书,如果客户端证书有效,客户端才能正常访问网页,否则无法访问https://www.secpulse.com/archives/71103.html
1.生成客户端证书
openssl req -new -SHA256 -newkey rsa:2048 -nodes -keyout user.key -out user.csr -subj "/C=CN/ST=Shanghai/L=Shanghai/O=11/OU=22/CN=user"
openssl x509 -req -days 365 -in user.csr -signkey user.key -out user.crt
openssl pkcs12 -export -cacerts -inkey user.key -in user.crt -out user.p12
2.服务器编辑文件\Apache24\conf\extra\httpd-ssl.conf
添加客户端证书的路径,指向user.crt
SSLEngine on
SSLCertificateFile "${SRVROOT}/conf/test.com.crt"
SSLCertificateKeyFile "${SRVROOT}/conf/test.com.key"
SSLCACertificateFile "${SRVROOT}/conf/user.crt"
开启客户端认证:
SSLVerifyClient require
SSLVerifyDepth  10
3.重启Apache
httpd.exe -k restart
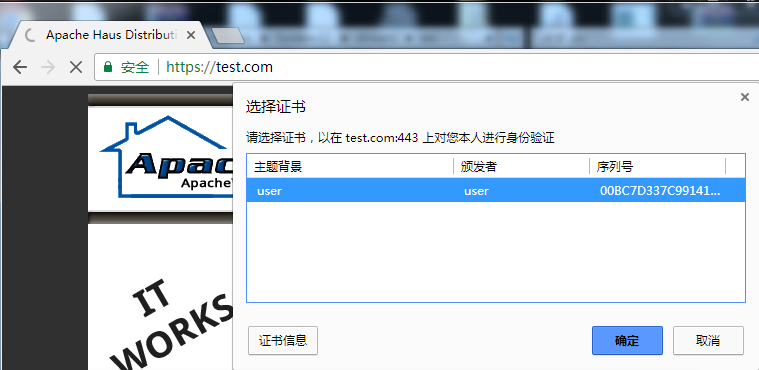
4.客户端安装证书user.p12
访问网页时弹框提示,确认证书后正常访问,如下图
1.生成客户端证书
openssl req -new -SHA256 -newkey rsa:2048 -nodes -keyout user.key -out user.csr -subj "/C=CN/ST=Shanghai/L=Shanghai/O=11/OU=22/CN=user"
openssl x509 -req -days 365 -in user.csr -signkey user.key -out user.crt
openssl pkcs12 -export -cacerts -inkey user.key -in user.crt -out user.p12
2.服务器编辑文件/etc/apache2/sites-enabled/default-ssl.conf
指定私钥文件、签名证书和客户端证书的路径
SSLEngine on
SSLCertificateFile /etc/apache2/ssl/test.com.crt
SSLCertificateKeyFile /etc/apache2/ssl/test.com.key
SSLCACertificateKeyFile /etc/apache2/ssl/user.crt
开启客户端认证:
SSLVerifyClient require
SSLVerifyDepth  10
3.重启Apache
sudo /etc/init.d/apache2 restart
4.客户端安装证书user.p12
正常访问
配置方法参照上篇文章,本文不再赘述
最终能实现对Https的流量进行判断,如果证书有效,转发到真实服务器
如果证书无效,可选择转发到Cover Server或是不提供服务
本文介绍了Windows系统和Ubuntu系统下配置Apache https的方法,分享SSL证书生成方法和配置过程,在技术研究的角度实现了对Https的流量判断,根据条件进行https流量的分发。
至此,成功实现Hive的流量分发功能。
CIA Hive Beacon Infrastructure复现2——使用Apache mod_rewrite实现https流量分发
本文作者:3gstudent
本文为安全脉搏专栏作者发布,转载请注明:https://www.secpulse.com/archives/71103.html


必填 您当前尚未登录。 登录? 注册
必填(保密)